2012-08-24

Pre-Wedding Ceremony Cake

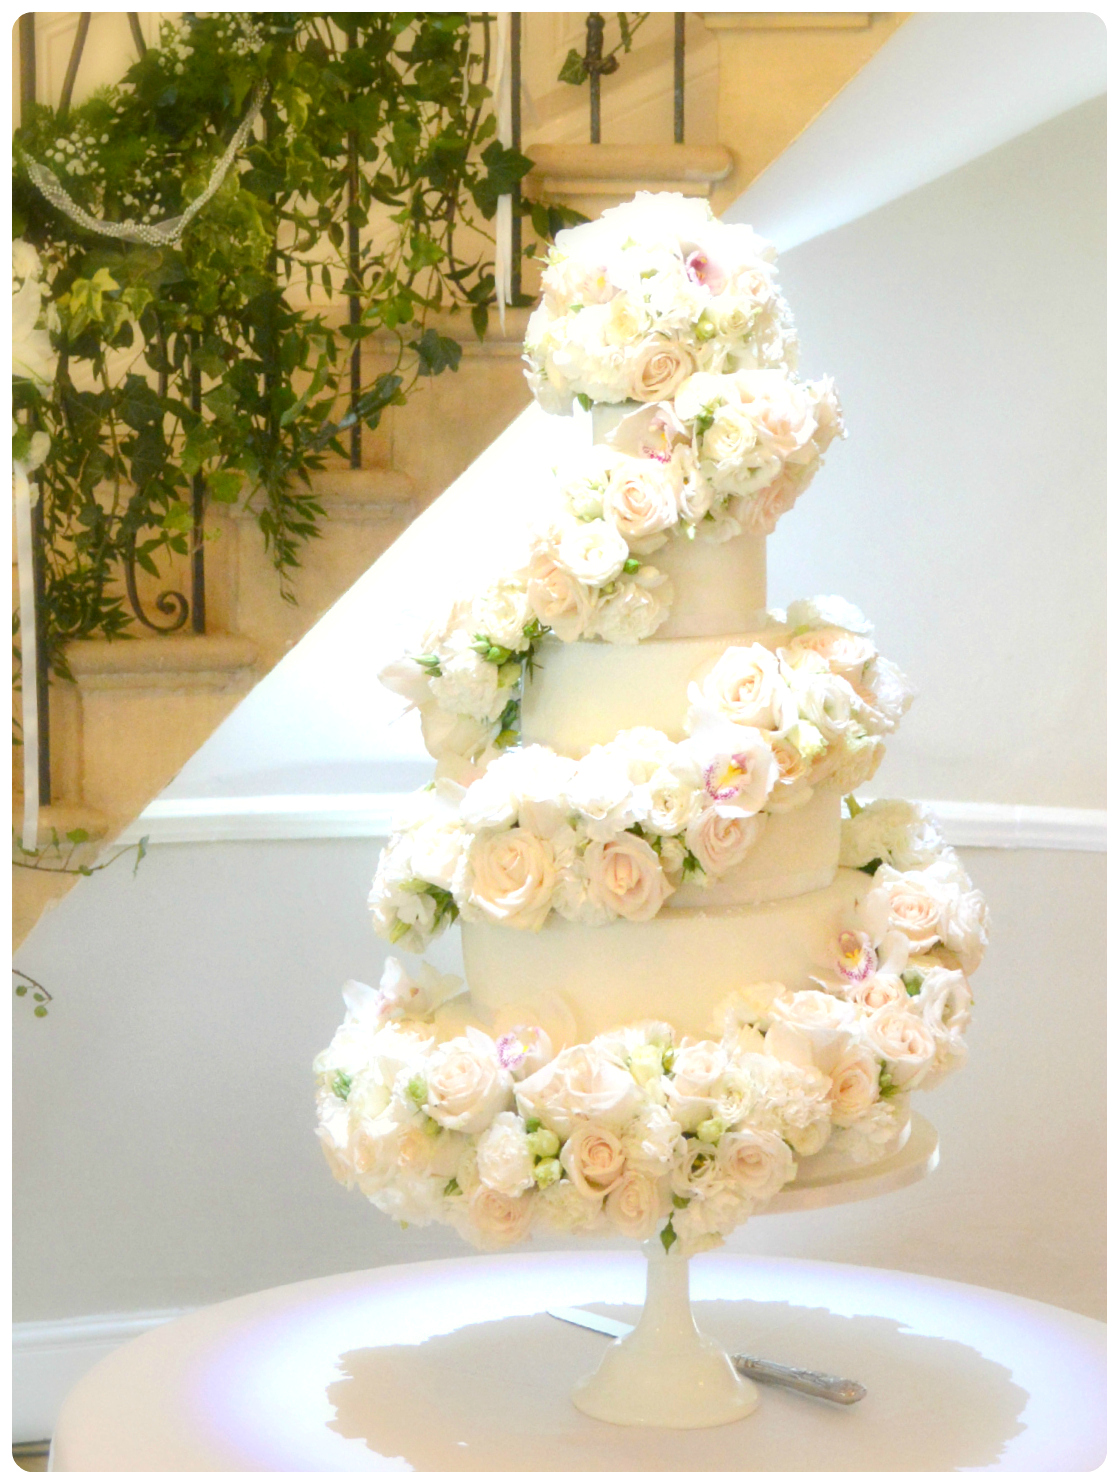
It has been a while since I last updated, Aleha kindly let me make her this Pre-Wedding Ceremony Cake, the bride gave me some preference of the size, flavour and design of the cake she liked, I have then been busy making this cake.

Cherie Kelly's Pre-Wedding Ceremony Cake
This is the biggest cake I have ever made, I worried it would be very heavy to carry as I could barely lift it myself and couldnt find a bag to put this 12 inches cake in... i couldnt make it to the Pre-Wedding Ceremony  , Jemma and Jamie kindly helped me to bring the cake all the way to Aleha!!
Cherie Kelly's Pre-Wedding Ceremony Cake

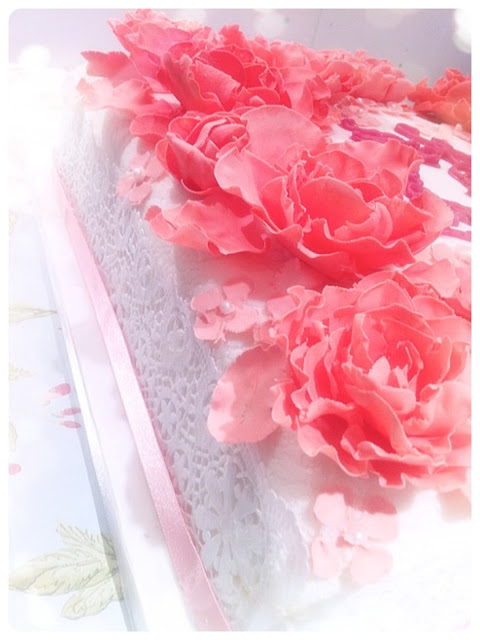
I spent most of the time making the sugar flowers, we all agree presentation is most important :-P
Cherie Kelly's Pre-Wedding Ceremony Cake

I definitely looking to practice more in icing cakes and decorating in sugar flowers, although making the sugar flowers do take quite a long time, I do enjoy it very much : )
Cherie Kelly's Pre-Wedding Ceremony CakeCherie Kelly's Pre-Wedding Ceremony CakeCherie Kelly's Pre-Wedding Ceremony Cake


Congratulation to Aleha again! Wish you all the happiness on your wedding day and a happy wedded life 
Cherie Kelly's Pre-Wedding Ceremony Cake


2012-08-15

Banoffee Cupcakes with Toffee Filling

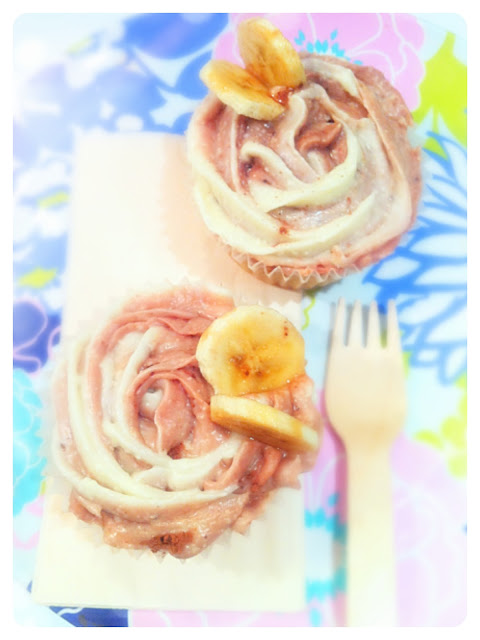
When you live in Central London, those supermarkets around the area do not sell enough interesting varieties of ingredients for baking and cooking, I stocked up a few canned of Nestle Carnation Caramel last time when I went to a bigger supermarket, I had a can left and found it very precious :-P I used one to make banoffee pie last time, and looking to make a cake version of it - Banoffee Cupcakes with Toffee Filling! like what i made for tiramisu cupcakes with mascarpone cheese filling, sinfully irresistible :-O

Cherie Kelly's Banoffee Cupcakes with Toffee Filling


Recipe adapted and modified from The British Larder

Banoffee Cupcakes with Toffee Filling

Make 8 cupcakes

Ingredients

For the Banana and White Chocolate Cupcakes:

130g unsalted butter, at room temperature
120g caster sugar
2 very ripe banana, peeled and mashed
2 large free range eggs
125g plain flour
25g cornflour
1tsp baking powder
50g dark chocolate chips (you can use white chocolate chips)
100g Nestle Carnation Caramel for the filling (optional)

For the cream cheese frosting:

200g icing sugar, sifted
50g unsalted butter, at room temperature
125g cream cheese, cold
1 tablespoon of Nestle Carnation Caramel


Method

Banana and White Chocolate Cupcakes:

1. Preheat the oven to 180°C and line a large muffin tray with 8 cupcake cases.
2. Cream the soft butter and sugar until pale and fluffy.
3. Add the mashed banana, cream until well incorporated, add the eggs one at a time, cream well after each addition.
4. Sift the flour, baking powder and cornflour over the creamed banana mixture and add the white chocolate chips, fold it all together. Do not over work the cupcake batter.
5. Spoon the cupcake batter into each case for three quarters full.
6. Bake the cupcakes in the preheated oven for 20 - 22 minutes, test if they are baked by inserting a metal skewer if the skewer comes out clean then the cupcakes are done.
7. Transfer the cupcakes to a cooling rack and let them cool completely.
8. (optional) Core each cupcake and fill each hollow with caramel with a teaspoon.

Cream Cheese Frosting:

1. Beat the icing sugar gradually into the butter by a electric whisk on medium-slow speed until the mixture comes together and is well mixed.
2. Add the cream cheese in one go and beat until it is completely incorporated. Turn the mixer up to medium-high speed.
3. Separate the cream cheese into 2 portions, fold in 1 tablespoon of Caramel.
4. Vertically fill one side of the piping bag with the original cream cheese frosting, and the caramel cream cheese frosting on the other side, this will allow the piped frosting come out in two-toned colour.
5. Pipe the frosting onto the cupcake. They are best eating the day after they are made. Keep in a cool place, but do not refrigerate.


2012-08-09

Red Velvet Piped Rose Cake

It was Kristina's fabulous 30th birthday yesterday, I didnt believe her turning 30th when I saw her birthday drinks and dinner invitation last week, no idea how she looks so young! Kristina moved from New York to London last year, she is extremely fun and has totally brightened up the whole environment at/after work, everyone loves her! I hope she is not feeling too homesick on her birthday. I decided to make her a Red Velvet Cake and decorated with rose swirls, because I remember she wore a big beautiful flower fascinator to Royal Ascot ❤ 


Cherie Kelly's Red Velvet Cake


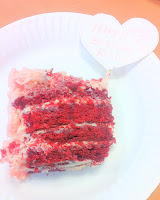
I like the cut-out slice : ) which can see the redness from the cake.


Red Velvet Cake 

Ingredients

For the red velvet cake:

120g unsalted butter, at room temperature
290g caster sugar
2 egg
15g cocoa powder
35ml red food colouring (recommend Dr. Oetker's or a paste colouring as red food colourings vary in strength)
2 tsp vanilla extract
240ml buttermilk (can be substituted by 240ml milk + 2 tbp lemon juice)
300g plain flour
1 tsp salt
1 tsp bicarbonate of soda
3 tsp white wine vinegar

For the cream cheese frosting: 

(this will make enough to sandwich 4 layers and pipe the roses all over the cake)
900g icing sugar
150g unsalted butter, at room temperature
375g cream cheese, cold

You'll also need:

7 or 8 inches cake tins x 2

Method

1. Preheat the oven to 170°C/325°F/gas mark 3.

2. Put the butter and the sugar in a freestanding electric mixer with a paddle attachment (or use a handheld electric whisk) and beat on medium speed until light and fluffy and well mixed. Turn the mixer up to high speed, slowly add the egg and beat until everything is well incorporated.

3. In a separate bowl, mix together the cocoa powder, red food colouring and vanilla extract to make a thick, dark paste. Add to the butter mixture and mix thoroughly until evenly combined and coloured (scrape any unmixed ingredients from the side of the bowl with a rubber spatula). Turn the mixer down to slow speed and slowly pour in half the buttermilk. Beat until well mixed, then add half the flour, and beat until everything is well incorporated. Repeat this process until all the buttermilk and flour have been added. Scrape down the side of the bowl again. Turn the mixer up to high speed and beat until you have a smooth, even mixture. Turn the mixer down to low speed and add the salt, bicarbonate of soda and vinegar. Beat until well mixed, then turn up the speed again and beat for a couple more minutes.

4. Divide the moxture into 2 portion and pour each portion into each geased tins. Bake in the preheated oven for 30-35 mins, or until the sponge bounces back when touched. A skewer inserted in the centre should come out clean. Leave the cakes to cool slightly in the tray before turning out onto a wire cooling rack to cool completely.

5. Meanwhile for the cream cheese frosting: Beat the icing sugar and butter together in a freestanding electric mixer with a paddle attachment (or use a handheld electric whisk) on medium-slow speed until the mixture comes together and is well mixed. Add the cream cheese in one go and beat until it is completely incorporated. Turn the mixer up to medium-high speed.

6. Continue beating until the frosting is light and fluffy, at least 5 mins. Do not overbeat, as it can quickly become runny.

7. When the cakes are cold, cut them into half so they become 4 cake slices. Sandwich and stack the layers, decorate by piping roses all over.


2012-08-06

My Wedding/Special Occasion Line ♪

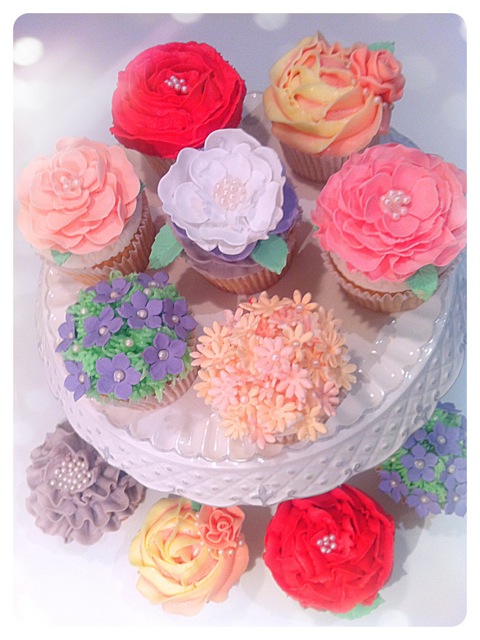
I recently learnt and mastered some new piping skills and flowerpaste skills, I handmade all these flowers for these buttercream vanilla cupcakes, I am very contented with how pretty they look ❤ 


I truely enjoy making the flowers and am going to make more ( ^o^ )

Cherie Kelly's Buttercream Vanilla Cupcakes

Cherie Kelly's Buttercream Vanilla Cupcakes


Vanilla Buttercream Cupcakes


Make 12 cupcake


Ingredients:

For the Vanilla Cupcakes

150g butter, softened at room temperature
150g caster sugar
3 free-range eggs, at room temperature
1 tsp vanilla essence
150g self-raising flour
1-2 tbsp milk


For the Vanilla Buttercream Icing

125 unsalted butter, softened at room temperature
250g icing sugar
1 tbsp milk
1 tsp vanilla essence
a few drops food colouring


Method:

For the Vanilla Cupcakes

1. Preheat the oven to 175C. Line a 12-hole baking muffin tin with cupcake cases.
2. Beat the butter and sugar with an electric mixer in a bowl until pale for at least 5 mins. 
3. Add and mix in the eggs gradually and stir in the milk and vanilla extract.
4. Sift the flour into the mixture and stir until well-combined.
5. Spoon the mixture into the cupcake cases to 2/3 full. 
6. Bake the cupcakes for 20 mins until a skewer inserted into the centre of the cupcakes and come out clean.
7. Leave them on wire rack to cool.


For the Vanilla Buttercream Icing

1. Beat the butter by adding the icing sugar gradually in a large bowl until soft. 
2. Add the milk, vanilla essence and food colouring, whisk until the mixture is smooth and creamy.
3. Spoon the buttercream mixture into a piping bag with a star nozzle and pipe onto the cupcakes in a large swirl.


Mango Millefeuilles (Napoleons)

When it came to Karin's birthday, I asked her if I could make her a birthday cake with her beloved puppy RoyRoy's face, she kindly approved my idea, because I thought she didnt want anyone to cut Roy's face. It was actually quite challenging to make a puppy face! I tried to make it by cookie dough and choux pastry, unfortunately both cracked because of the large surface (for a 14inch oblong cake). I moved onto puff pastry, happily it worked!


Cherie Kelly's Mango Millefeuilles (Napoleons) with puppy RoyRoy's face


Assembling the layers:Cherie Kelly's Mango Millefeuilles (Napoleons) with puppy RoyRoy's face


and most importantly, Karin and Clement are very happy to see and taste the cake! :-D they didnt even cut the pastry with RoyRoy's face on it, they took it home in one piece to show Roy 


2012-08-05

Mango and Vanilla Mousse Cake


It was Rohit's birthday last Friday, I made him a Mango and Vanilla Mousse Cake for him and his family, as I remember he told me he likes mango : )

Cherie Kelly's Mango and Vanilla Mousse Cake

I recently bought cake boxes to put cakes in and it fit prefectly!

Cherie Kelly's Mango and Vanilla Mousse Cake


and I am so pleased that Rohit and his family like the cake, he even took a picture for me to show how it looked like inside :-D
Cherie Kelly's Mango and Vanilla Mousse Cake


Mango and Vanilla Mousse Cake


Make one 8 inch cake

Ingredients


Génoise (Sponge Cake)

2 eggs
60g caster sugar
1.5 tsp water
60g cake flour
20g melted butter

Vanilla Mousse

150g whipping cream
50g milk
33g granulated sugar
2 teaspoon of vanilla bean paste
4g leaf gelatine

Mango cubes

120g diced mango cubes

Mango Mousse

450g mango puree
12.5g leaf gelatine
10g granulated sugar
400g whipped cream

Mango Glaze

1 teaspoon of lemon juice
100g mango puree
4g leaf gelatine
1 teaspoons of granulated sugar

Utensils

8-inch cake tin
7-inch deep dish for the Vanilla Mousse

Methods

For the Sponge Cake

1. Grease the cake tin with some butter. Preheat the oven to 180C (350F).
2. Beat eggs and sugar with wire whisk in a metal bowl over a pan of hot water.
3. Beat the batter on high speed for about 7 minutes until white and fluffy with an electric mixer.
4. Add water and sift in flour, whisk for about 3 minutes on low speed to incorporate.
5. Fold in melted butter until well combined
6. Spread the batter in the brownie pan and drop the pan lightly on the counter to raise the air bubbles out of the batter.
7. Bake at 180C (350F) for 20-25 minutes till lightly brown. (cooking time may differ depend on the heat of the oven)
8. When it's done, place it on a wire rack to cool.
9. When it is cool enough, remove the cake from the tin, trim and cut away 1 cm of the side, this will leave a gap between the cake and the tin.

For the Vanilla Mousse

1. Bring whipping cream, milk, sugar and vanilla bean paste to boil.
2. Remove from heat, add and stir softened gelatine until dissolved.
3. Leave to cool. Line cling film to wrap the inside of a 7-inch deep dish, this will help lift the vanilla mousse layer easily once it is set. Pour the mixture through a sifter into the dish.
4. Chill in the fridge until set.

For the Mango Mousse

1. Boil half of the mango puree with the sugar until sugar is dissolved.
2. Remove from heat, add and stir softened gelatine until dissolved.
3. Mix in the other half of mango puree.
4. Add whipped cream and stir well to light yellow mango mousse.

To assemble

1. Place the cake slice back to the cake tin. Spoon the mango mousse into the gap between the cake and the tin, allow a bit to go over the edge of side.
2. Carefully lift the vanilla mousse and place over the cake slice.
3. Spoon a thin layer of mango mousse on top of the vanilla mousse and place the diced mango cubes around the center.
4. Pour in the remaining mango mousse and smooth the surface. Chill in the fridge until set or freeze for 1 hour.

For the Mango Glaze

1. Boil half of the mango puree with the sugar until sugar is dissolved.
2. Remove from heat, add and stir softened gelatine until dissolved.
3. Mix in the other half of mango puree and lemon juice.
4. Leave to cool. Meanwhile take out the mango mousse cake.
5. Pour the mango glaze over.
6. Chill in the fridge until set. Unmould carefully by running a knife along the edge. Decorate and enjoy.


Pistachio, Chocolate and Salted Caramel Macarons


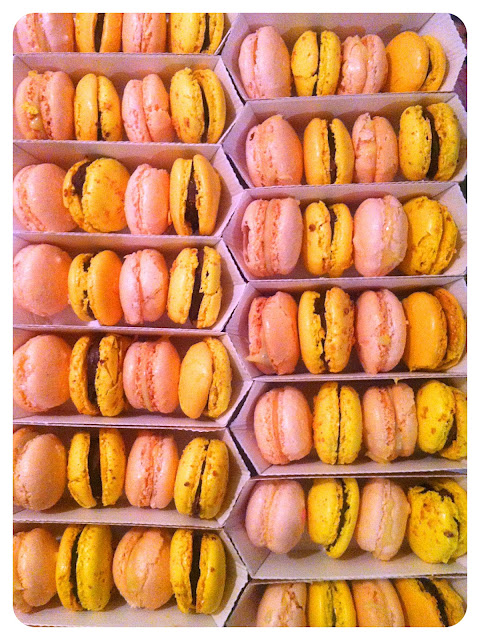
I found these pretty cupcake boxes recently and couldnt wait to use them, instead of putting cupcakes in them, I made macarons to put in them, they are prefect for presents for the beloved ones ❤ 
Cherie Kelly's Pistachio, Chocolate and Salted Caramel Macarons

My fridge was full of macarons :-P such a view! (oh and a small banoffee pie too)

Recipe adapted and modified from Pierre Herme:

Salted Caramel Macarons

Ingredients

For the macaron shells

300g icing sugar
300g ground almonds
220g egg whites at room temperature, aged 7 days
4.5g pink food colouring (I used pink here, you can use other colour of your choice)
75 ml mineral water
300g granulated sugar

For the Salted-Caramel cream

300g sugar
335g creme fraiche
65g French salted butter
290g French butter, softened

Method

To make the salted-caramel cream:

1. Put 50g of the sugar in a heavy bottom saucepan. Cook the sugar on medium heat and incorporate another 50g of the sugar. Repeat 4 more times until all the sugar has melted, stir occasionally carefull for the sugar to caramelize. Meanwhile, bring the creme fraiche to boil and remove from heat.
2. Once the sugar turn to a deep amber color and remove from the heat. Add the 65g of salted French butter while mixing with a wooden spatula carefully as the mixture is extremely hot. Add the creme fraiche in several additions and keep mixing with the wooden spatula.
3. Place the pot back onto the hob and boil on low heat and cook until it reached 108'C. Pour in a deep dish, cover on contact with cling wrap and refrigerate until cold.
4. Meanwhile, beat the remaining 290g of butter for 8 to 10 minutes, until light and fluffy and incorporate it to the caramel cream in two additions. Place in a pastry bag with a plain 1cm tip.

To make the shells 

1. Line 2-3 silicon baking mats with macarons circle-shaped template underneath. (You can draw a parchment with circles 1.5in/3.8mm wide around a shot glass, spacing them ¾in/2cm apart, turn the paper over and use it as a template). You can also use baking sheets with baking parchment, but silicon baking mats do make better macaron shells.
2. Sift the icing sugar, ground hazelnuts and ground almonds into a large bowl. (I usually skip this step as I don’t see much difference with the shells)
3. Divide the egg whites into two equal portions.
4. Mix the food colouring into one portion, pour to the bowl with the icing sugar and almonds do not mix it.
5. Put the mineral water in a small pan and add the granulated sugar. Heat gently until the sugar dissolves, then boil the syrup using a thermometer to track its temperature.
6. Meanwhile, put the other half of the egg whites in a bowl and plug in the electric beaters. When the syrup reaches 240F/115C, begin to beat the second quantity of egg whites to soft peaks.
7. Once the syrup reaches 244F/118C, pour it slowly on to the whites, beating all the time. Keep beating until the mixture returns to a soft peak consistency and has cooled to 122F/50C. (This egg white-syrup mousse is what chefs call an Italian meringue.)
8. Add the beaten egg whites to the bowl with the icing sugar and almonds,  mix until it is incorporated without trying to fold in too much air.
9. Spoon the mixture into a piping bag fitted with a 1cm plain tip. (Depending on the size of your piping bag, you’ll probably need to do this in three or four batches.)
10. Pipe the mixture onto silicon baking mats with the template underneath or baking sheets lined with the parchment paper marked with circles.
11. Tap the baking sheets on a work surface covered with kitchen towel to release the air bubbles from the macaron shells.
12. Let the shells stand for half an hour, until a skin forms on the surface. Meanwhile, preheat the oven to 350F/180C/gas mark 4.
13. Slide the baking mats/sheets into the middle or lower shelf of the preheated oven. Bake for 12 minutes, quickly opening and shutting the oven door twice during the cooking time to let the steam escape.
14. Take the baking mats/sheets out of the oven. Slide the mats/sheets of parchment paper with shells onto a work surface and leave to cool.

To assemble the macarons

1. Pipe a generous amount of salted-caramel cream onto a shell, then top with another shell, twisting lightly so that the filling spreads and bulges enticingly.
2. Store the macarons covered in the fridge for at least 24 hours to allow the inside of the macaron shells to soften.
3. Bring back to room temperature before eating.


Pistachio Macarons

Ingredients

For the macaron shells

300g icing sugar
150g ground almonds
150g ground pistachio
220g egg whites at room temperature, aged 7 days
4.5g yellow food colouring
75 ml mineral water
300g granulated sugar

For the pistachio ganache

300g whipping cream
300g white chocolate
80g pistachio paste (or 80g unsalted pistachios, blended with the cream)


Method


To make the shells 

1. Line 2-3 silicon baking mats with macarons circle-shaped template underneath. (You can draw a parchment with circles 1.5in/3.8mm wide around a shot glass, spacing them ¾in/2cm apart, turn the paper over and use it as a template). You can also use baking sheets with baking parchment, but silicon baking mats do make better macaron shells.
2. Sift the icing sugar, ground pistachio and ground almonds into a large bowl. (I usually skip this step as I don’t see much difference with the shells)
3. Divide the egg whites into two equal portions.
4. Mix the food colouring into one portion, pour to the bowl with the icing sugar and almonds do not mix it.
5. Put the mineral water in a small pan and add the granulated sugar. Heat gently until the sugar dissolves, then boil the syrup using a thermometer to track its temperature.
6. Meanwhile, put the other half of the egg whites in a bowl and plug in the electric beaters. When the syrup reaches 240F/115C, begin to beat the second quantity of egg whites to soft peaks.
7. Once the syrup reaches 244F/118C, pour it slowly on to the whites, beating all the time. Keep beating until the mixture returns to a soft peak consistency and has cooled to 122F/50C. (This egg white-syrup mousse is what chefs call an Italian meringue.)
8. Add the beaten egg whites to the bowl with the icing sugar and almonds,  mix until it is incorporated without trying to fold in too much air.
9. Spoon the mixture into a piping bag fitted with a 1cm plain tip. (Depending on the size of your piping bag, you’ll probably need to do this in three or four batches.)
10. Pipe the mixture onto silicon baking mats with the template underneath or baking sheets lined with the parchment paper marked with circles.
11. Tap the baking sheets on a work surface covered with kitchen towel to release the air bubbles from the macaron shells.
12. Let the shells stand for half an hour, until a skin forms on the surface. Meanwhile, preheat the oven to 350F/180C/gas mark 4.
13. Slide the baking mats/sheets into the middle or lower shelf of the preheated oven. Bake for 12 minutes, quickly opening and shutting the oven door twice during the cooking time to let the steam escape.
14. Take the baking mats/sheets out of the oven. Slide the mats/sheets of parchment paper with shells onto a work surface and leave to cool.

To make the ganache 

1. Break the white chocolate into pieces and put into a bowl. Boil the cream with the pistachio paste, and pour about a third at a time onto the chopped chocolate, mixing each time until well incorporated.
2. Allow the pistachio mixture to cool to 122F/50C.
3. Pour into a wide dish. Press clingfilm onto the surface of the ganache and refrigerate until thick enough to pipe.

To assemble the macarons

1. Spoon the ganache into a pastry bag fitted with a 1cm plain tip. Pipe a generous round onto a shell, then top with another shell, twisting lightly so that the filling spreads and bulges enticingly.
2. Store the macarons covered in the fridge for at least 24 hours to allow the inside of the macaron shells to soften.
3. Bring back to room temperature before eating.


Chocolate Macarons

Ingredients


For the macaron shells

300g icing sugar
300g ground almonds
220g egg whites at room temperature, aged 7 days
4.5g purple food colouring  (I used purple here, you can use other colour of your choice)
75 ml mineral water
300g granulated sugar

For the hazelnuts chocolate ganache

50g butter at room temperature
100g best-quality plain chocolate
300g best-quality milk chocolate
400g whipping cream

Method


To make the shells 

1. Line 2-3 silicon baking mats with macarons circle-shaped template underneath. (You can draw a parchment with circles 1.5in/3.8mm wide around a shot glass, spacing them ¾in/2cm apart, turn the paper over and use it as a template). You can also use baking sheets with baking parchment, but silicon baking mats do make better macaron shells.
2.  Sift the icing sugar and ground almonds into a large bowl. (I usually skip this step as I don’t see much difference with the shells)
3. Divide the egg whites into two equal portions.
4. Mix the food colouring into one portion, pour to the bowl with the icing sugar and almonds do not mix it.
5. Put the mineral water in a small pan and add the granulated sugar. Heat gently until the sugar dissolves, then boil the syrup using a thermometer to track its temperature.
6. Meanwhile, put the other half of the egg whites in a bowl and plug in the electric beaters. When the syrup reaches 240F/115C, begin to beat the second quantity of egg whites to soft peaks.
7. Once the syrup reaches 244F/118C, pour it slowly on to the whites, beating all the time. Keep beating until the mixture returns to a soft peak consistency and has cooled to 122F/50C. (This egg white-syrup mousse is what chefs call an Italian meringue.)
8. Add the beaten egg whites to the bowl with the icing sugar and almonds,  mix until it is incorporated without trying to fold in too much air.
9. Spoon the mixture into a piping bag fitted with a 1cm plain tip. (Depending on the size of your piping bag, you’ll probably need to do this in three or four batches.)
10. Pipe the mixture onto silicon baking mats with the template underneath or baking sheets lined with the parchment paper marked with circles.
11. Tap the baking sheets on a work surface covered with kitchen towel to release the air bubbles from the macaron shells.
12. Let the shells stand for half an hour, until a skin forms on the surface. Meanwhile, preheat the oven to 350F/180C/gas mark 4.
13. Slide the baking mats/sheets into the middle or lower shelf of the preheated oven. Bake for 12 minutes, quickly opening and shutting the oven door twice during the cooking time to let the steam escape.
14. Take the baking mats/sheets out of the oven. Slide the mats/sheets of parchment paper with shells onto a work surface and leave to cool.

To make the ganache 

1. Cut the butter into pieces.
2. Break all the dark and milk chocolate into pieces and put into a bowl. Boil the cream and pour about a third at a time onto the chopped chocolate, mixing each time. The mixture will separate and look grainy, but keep mixing and it will come together.
3. Allow the chocolate mixture to cool to 122F/50C.
4. Add the chopped butter, beat until smooth.
5. Pour into a wide dish. Press clingfilm onto the surface of the ganache and refrigerate until thick enough to pipe.

To assemble the macarons

1. Spoon the ganache into a pastry bag fitted with a 1cm plain tip. Pipe a generous round onto a shell, then top with another shell, twisting lightly so that the filling spreads and bulges enticingly.
2. Store the macarons covered in the fridge for at least 24 hours to allow the inside of the macaron shells to soften.
3. Bring back to room temperature before eating.


Ispahan


After indulging an Ispahan from Laduree, I decided to make one myself. The combination of lychee, raspberries, rose buttercream and macaron shells is just prefect.

Cherie Kelly's Ispahan

The recipe is actually the same from the rose macarons, lychee and raspberries are added in between the macaron shells.


Ispahan 


Ingredients

For the macaron shells

300g Ground Almonds
300g Icing Sugar
110g Egg Whites (aged in the fridge for a few days to a week)
5g Red Food Colouring
300g Granulated Sugar
75g Water
110 Egg Whites (aged in the fridge for a few days to a week)

For the Rose Buttercream

200g Granulated Sugar
75g Water
150g Eggs
90g Egg Yolks
400g Butter, very soft
4g Rose Essence
50g Rose Syrup

Filling

600g canned lychees (Drained and cut into half)
800g fresh raspberries

Methods

Macaron Shells


1. Sieve the ground almonds and icing sugar into a bowl. Add the colouring into the first portion of egg whites, pour them into the sugar/almond mixture but do not stir.

2. Bring the water and sugar to boil to 118 degree in a saucepan. When the sugar syrup reaches 115 degree, start whisking the second portion of egg whites until soft peaks. Once the syrup reaches 118 degree, pour it over the egg whites take down the side of the bowl, continue to whisk on high speed until it cools down to 50 degree and turns glossy.

3. Pour all of the meringue to the bowl with the almond sugar mixture. Fold fold the mixture with a large spatula until it starts to shine and forms a visible ribbon.

4. Spoon the mixture into a piping bag fitted with a plain nozzle and pipe rounds of 7cm with 2cm gaps apart from each other onto parchment paper. Set aside for about 30 minutes or until a skin forms that does not stick onto your finger.

5. Bake the macarons in preheated oven between 160-180 degree for 12 mintues. Remove the macaron shells from the oven and tray, place the parchment onto the work surface and let cool completely before removing the shells.

Rose Buttercream


1. Boil the sugar and water in a saucepan until 120 degree. At the same time, whisk the eggs and egg yolks in a bowl until thickened and lightened in colour.

2. Pour the syrup down the side of the bowl and continue to whisk until cooled.

3. Cream butter in another bowl until thickened, add the egg mixture and whisk until smooth, then beat in the rose syrup and essence.

Assemble


1. Sandwich macaron shells with the buttercream, cover the base with rose buttercream. Place the lychees in the center and the raspberries around the side of the macaron shell. Pipe more rose buttercream over the lychee and cover with a second similar sized macaron shell.

2. Chill overnight to set before serving.


Hummingbird Black Bottom Cupcakes

I was looking for some chocolate cupcakes recipe, this looked very interesting to me with dark chocolate sponge with a dollop of cheesecake baked into it, I gave a try, these cupcakes are more dense than the usual ones, chocolate lovers would definitely like them.

Cherie Kelly's Black Bottom Cupcakes

Recipe adapted from Hummingbird Bakery: 

Hummingbird Black Bottom Cupcakes 


Ingredients

For the chocolate sponge base

190g plain flour
120g caster sugar
40g cocoa powder, plus extra to decorate
½ tsp bicarbonate of soda
40 ml sunflower oil
1½ tsps white vinegar
½ tsp vanilla extract

For the cheesecake filling

140g cream cheese
60g caster sugar
1 egg
½ tsp vanilla extract
A pinch of salt
100g milk chocolate chips

For the cream cheese frosting

300g icing sugar, sifted
50g unsalted butter, at room temperature
125g cream cheese, cold

Method

1. Preheat the oven to 170°C (325°F) Gas 3. For the chocolate sponge base put the flour, sugar, cocoa powder and bicarbonate of soda in a large bowl and mix with a handheld electric whisk on slow speed until all the dry ingredients are well incorporated.
2. Put the oil, vinegar, vanilla extract and 125 ml water in a jug and whisk to combine. While the electric whisk is running in the flour bowl, slowly add the contents of the jug, increasing the speed of the blender as the mixture thickens. Continue to beat until all the ingredients are incorporated (scrape any unmixed ingredients from the side of the bowl with a rubber spatula).
3. Line a 12 hole cupcake tray with paper cases. Spoon the mixture into the paper cases until two-thirds full and set aside.
4. For the cheesecake filling beat together the cream cheese, sugar, egg, vanilla extract and salt in a freestanding electric mixer with a paddle attachment (or use a handheld electric whisk) on medium-slow speed until smooth and fluffy.
5. Stir in the chocolate chips by hand until evenly dispersed. Don’t overmix, otherwise the cream cheese will start to split.
6. Scoop about 1 tbsp of the cheesecake filling on top of the cupcake mixture and bake in the preheated oven for about 20 minutes, or until the cupcakes are firm to the touch and they have an even golden colour on the cheesecake filling. Don’t overcook as the cheesecake will become very dry and crumbly.
7. Leave the cupcakes to cool slightly in the tray before turning out onto a wire cooling rack to cool completely.
8. For the cream cheese frosting beat the icing sugar and butter together in a freestanding electric mixer with a paddle attachment (or use a handheld electric whisk) on medium-slow speed until the mixture comes together and is well mixed. Add the cream cheese in one go and beat until it is completely incorporated. Turn the mixer up to medium-high speed. Continue beating until the frosting is light and fluffy, at least 5 minutes. Do not overbeat, as it can quickly become runny.
9. When the cupcakes are cold, spoon the cream cheese frosting on top, if using, and decorate with a light sprinkling of cocoa powder.


Fruit Tarts


I bought a melon baller and was playing with it, the melon balls look so cute, so I made some easy fruit tarts with them x

Cherie Kelly's Fruit Tarts

Fruit Tarts


Ingredients:


For the Puff Pastry Tart

1 ready rolled out puff sheet
1 tablespoon icing sugar to dust

For the Cream Filling

200g double/whipping cream
2 tablespoon granulated sugar
1/2 teaspoon pure vanilla extract

For the Garnish

100g melted milk/dark chocolate
Berries, melon, peaches and fruits of your choice


Equipment:

8 inch tart pan or 8 small tart tins

Method:

Puff Pastry Tart

1. Roll out the puff pastry to fit an 8 inch tart pan and gently press the pastry into the bottom and up the sides of the tart pan.
2. Prick the bottom of the pastry with the tines of a fork.  Cover and refrigerate until well chilled  for 30 minutes to an hour.
3. Preheat oven to 200'C. Dust the puff pastry with a thin layer of icing sugar.
4. Bake the tart in the center of the oven for 15 minutes.  Reduce the oven temperature to 180'C and continue to bake the tart case for a further 5-10 minutes, or until the shell is golden brown.  Place on a wire rack to cool with the tart pan.

Cream Filling

1. In a large bowl, whisk the whipping cream with the sugar until fluffy.  Add vanilla and whisk until soft peaks forms.
2. Just before serving, spread a thin layer of the milk/dark chocolate in the tart case, refrigerate for 5 mins.
3. Spoon the cream on the tart case and top with fresh berries or cut up fruit.  Serve immediately.


Giant Cupcake

My friend Azzy loves cupcakes, I got her a giant cupcake mould for her birthday last year, but this year I got better I made her a real giant cupcake for her birthday, I dont have a mould, I baked the cake with a normal tin, cut and stack the slices into a giant cupcake with cream cheese filling and frosting. I doubled the red velvet cupcakes recipe and surrounded the base with white chocolate fingers, I was quite surprised it turned out very fine and more glad Azzy likes it : )

Cherie Kelly's Giant Cupcake


2012-08-04

Cantonese/Hong Kong Egg Tarts 港式蛋撻(牛油撻底)


These egg tarts are very popular especially when they are fresh and hot from the oven, this is a simple recipe to make the short-crush pastry cases, which taste better than the ready-rolled-out one.

Cherie Kelly's Cantonese/Hong Kong Egg Tarts


Recipe adapted from Christine's Recipes  

Cantonese Egg Tarts

Makes about 14-16 egg tarts (3-Inch Wide 1-1/2-Inch Deep Tart Tin)

Ingredients 


For the Crust

225g plain flour
125g butter
55g icing sugar
1 egg, whisked
a dash vanilla extract

For the Custard

3 eggs
110 gm caster sugar
225 gm hot water
85 gm evaporated milk
1/2 tsp vanilla extract


Method

For the Crust

1. Place butter at room temperature until softened. Cream the butter and sugar with an electric mixer over medium speed until the mixture is smooth, fluffy and light in color.
2. Add in whisked egg, half at a time, beat over low speed. Add vanilla extract, mix well.
3. Sift in flour in two batches, scraping down the sides of the bowl between additions with a spatula, and make sure all ingredients combine well. Knead into dough. (see picture)
4. Roll out the dough to a 1/2 cm thickness. Cut dough with a cookie cutter that is just a bit smaller than your tart tin in size. Line dough in the middle of tart tins, one by one. Lightly press the dough with your thumbs, starting from the bottom then up to the sides. While pressing the dough, turn the tart tin clockwise/anti-clockwise in order to make an even tart shell. Trim away any excess dough.

For the Custard

1. Add sugar into hot water, mix until completely dissolved.
2. Whisk egg with evaporated milk. Pour in sugar water. Mix well.
3. Sift egg mixture to get rid of any foam into a tea pot. Carefully pour egg mixture into each tart shell.

Baking the tarts

1. Preheat oven to 200C. Position rack in lower third of oven. (Placing tarts at the lower rack in oven could cook crusts easily before the egg custard being heated up too quickly). Bake tarts for 10 to 15 minutes until the edges are lightly brown.
2. Lower the heat to 180C. Keep an eye on them. Once you see the custard being puffed up a bit, pull the oven door open about 2 to 3 inches. Placing tarts at the lower rack in oven could cook crusts easily before the egg custard being heated up too quickly. Bake for another 10 to 15 minutes until the custard is cooked through. Just insert a toothpick into the custard. If it stands on its own, it’s done.


Strawberry Mousse Cake


Fresh and simple dessert for the British strawberry season.

Cherie Kelly's Strawberry Mousse Cake


Strawberry Mousse Cake


Ingredients

Strawberry Mousse

200g Strawberry puree
15g caster sugar
200g whipped cream
5g leaf gelatin

Génoise (Sponge Cake)

2 eggs
60g caster sugar
1.5 tsp water
60g cake flour
20g melted butter

Utensils

6 half sphere moulds
8-inch rectangle brownie pan (large enough to cut out 6 smaller circles cake with the same diameter of the individual half-sphere mould will do)

Methods

For the Sponge Cake

1. Line the brownie pan with greased parchment paper. Preheat the oven to 180C (350F).
2. Beat eggs and sugar with wire whisk in a metal bowl over a pan of hot water.
3. Beat the batter on high speed for about 7 minutes until white and fluffy with an electric mixer.
4. Add water and sift in flour, whisk for about 3 minutes on low speed to incorporate.
5. Fold in melted butter until well combined
6. Spread the batter in the brownie pan and drop the pan lightly on the counter to raise the air bubbles out of the batter.
7. Bake at 180C (350F) for 20-25 minutes till lightly brown. (cooking time may differ depend on the heat of the oven)
8. When it's done, drop the pan lightly to prevent shrinking. Remove the sponge cake from the pan by lifting the parchment paper and place it on a wire rack to cool.
9. When it's cool enough, remove the parchment paper and place the sponge cake on the parchment paper with the brown side up. Cut out 6 circles of cake slices with the same diameter of the individual half-sphere mould.


For the Strawberry Mousse

1. Boil half of the strawberry puree with the sugar until sugar is dissolved.
2. Remove from heat, add and stir softened gelatine until dissolved.
3. Mix in the other half of strawberry puree.
4. Add whipped cream and stir well to light pink strawberry mousse.
5. Fill the moulds to 4/5 full of chocolate mousse. Place the cake slides onto the mousse, gentle press to let the mousse stick around the sides of the cakes. Fridge 7 hours or overnight to set.
6. Gently un-mould the cakes, decorate and serve.


Caramel Budino with Salted Caramel Sauce


I was finding a different recipe to use up all the egg yolks when I saved all egg white for macarons, I was surprised tp find this Caramel Budino with Salted Caramel Sauce, it is not a simple recipe, try it and you will understand the outcome totally worth the effort making the caramel :-)

Cherie Kelly's Caramel Budino with Salted Caramel Sauce


Recipe adapted from bon appetit :

Caramel Budino with Salted Caramel Sauce


Ingredients

Cookie Crust

1 cup finely ground chocolate cookie crumbs (such as Nabisco Famous Chocolate Wafers; about 20 cookies)
2 tablespoons unsalted butter, melted
1/8 teaspoon kosher salt

Budino

3 cups whole milk, divided
1/4 cup cornstarch
3/4 cup (packed) dark brown sugar
5 large egg yolks
3 tablespoons unsalted butter
2 teaspoons dark rum
1 teaspoon kosher salt

Salted Caramel Sauce

3/4 cup plus 2 tablespoons heavy cream
1/2 vanilla bean, split lengthwise
1/2 cup sugar
2 tablespoons light corn syrup
4 tablespoons (1/2 stick) chilled unsalted butter, cut into 1/2" cubes
1/4 teaspoon kosher salt
Lightly sweetened whipped cream

Method

Cookie Crust

1. Mix cookie crumbs, butter, and salt in a medium bowl. Place 2 tablespoons in a small bowl; cover and chill for garnish. Press 2 tablespoons cookie mixture onto the bottom of each of eight 8-ounce mason jars or ramekins.

Budino

1. Whisk 1/2 cup milk and cornstarch in a small bowl; set aside. Heat remaining 2 1/2 cups milk in a small saucepan just to a simmer; set aside. To make caramel, stir sugar and 3/4 cup water in a heavy saucepan over medium heat until sugar dissolves. Increase heat; cook without stirring until an instant-read thermometer registers 210°–220°
2. Line a sieve with a double layer of cheesecloth and set over a large pitcher. Whisk egg yolks in a large bowl. Gradually whisk in hot milk, then cornstarch mixture. Slowly whisk in caramel. Return mixture to saucepan. Whisk constantly over medium heat until mixture thickens and a thermometer registers 175°, about 3 minutes. Remove from heat; whisk in butter, rum, and salt. Pour through prepared sieve.
3. Pour 1/2 cup budino over crust in each jar. Cover; chill until set, 4–5 hours. DO AHEAD Can be made 1 day ahead. Keep chilled.

Salted Caramel Sauce

1. Place cream in a small pitcher. Scrape in seeds from vanilla bean; add bean. Set aside.
2. Stir sugar, corn syrup, and 2 tablespoons water in a heavy saucepan over medium heat until sugar dissolves. Increase heat to medium-high; boil, occasionally swirling pan and brushing down sides with a wet pastry brush, until deep amber color forms, 5–6 minutes. Remove from heat; gradually add vanilla cream (mixture will bubble vigorously). Whisk over medium heat until smooth and thick, about 2 minutes. Remove from heat; whisk in butter and salt. Strain into a heatproof bowl. Let cool slightly.
3. Spoon 2 tablespoons caramel sauce over each budino. Top with whipped cream. Sprinkle some of reserved cookie crumbs over each.


2012-08-01

Hazelnut Chocolate and Vanilla Macarons

I think macarons is the most complicated thing to make in the patisseries world! All the ingredients have to be in its prefect measure and condition, like egg whites have to be aged for at least a few days, egg whites cannot be over-whisked, sugar syrup has to be cooked to 118'C etc..(which means I made myself to buy a thermometer to measure the temperature of the sugar syrup).. , macarons mixture have to piped in same-sized circles, fillings have to be in the right texture.. most importantly is the patience to leave the piped mixture to leave in room temperature for at 30 mins to form the skin, then bake each tray one by one in low temperature! I usually make at least 2 flavours, which mean there are 8-10 trays of shells to bake, it takes me 2 whole days to finish the whole process. I do love these challenges! and would like to master all the technique to make pretty macarons soon.

Cherie Kelly's Hazelnut and Vanilla Macarons


I made these last time to bring home to friends and family in Hong Kong : )
Cherie Kelly's Hazelnut and Vanilla Macarons


Recipe adapted from Pierre Herme:


Hazelnut Chocolate Macarons

Ingredients


For the macaron shells

300g icing sugar
150g ground almonds
150g ground hazelnuts
220g egg whites at room temperature, aged 7 days
4.5g yellow food colouring
75 ml mineral water
300g granulated sugar

For the hazelnuts chocolate ganache

140g butter at room temperature
100g best-quality plain chocolate
150g best-quality milk chocolate
150g Nutella hazelnuts spread
400g whipping cream

Method


To make the shells 

1.       Line 2-3 silicon baking mats with macarons circle-shaped template underneath. (You can draw a parchment with circles 1½in/3.8mm wide around a shot glass, spacing them ¾in/2cm apart, turn the paper over and use it as a template). You can also use baking sheets with baking parchment, but silicon baking mats do make better macaron shells.
2.       Sift the icing sugar, ground hazelnuts and ground almonds into a large bowl. (I usually skip this step as I don’t see much difference with the shells)
3.       Divide the egg whites into two equal portions.
4.       Mix the food colouring into one portion, pour to the bowl with the icing sugar and almonds do not mix it.
5.       Put the mineral water in a small pan and add the granulated sugar. Heat gently until the sugar dissolves, then boil the syrup using a thermometer to track its temperature.
6.       Meanwhile, put the other half of the egg whites in a bowl and plug in the electric beaters. When the syrup reaches 240F/115C, begin to beat the second quantity of egg whites to soft peaks.
7.       Once the syrup reaches 244F/118C, pour it slowly on to the whites, beating all the time. Keep beating until the mixture returns to a soft peak consistency and has cooled to 122F/50C. (This egg white-syrup mousse is what chefs call an Italian meringue.)
8.       Add the beaten egg whites to the bowl with the icing sugar and almonds,  mix until it is incorporated without trying to fold in too much air.
9.       Spoon the mixture into a piping bag fitted with a 1cm plain tip. (Depending on the size of your piping bag, you’ll probably need to do this in three or four batches.)
10.   Pipe the mixture onto silicon baking mats with the template underneath or baking sheets lined with the parchment paper marked with circles.
11.   Tap the baking sheets on a work surface covered with kitchen towel to release the air bubbles from the macaron shells.
12.   Let the shells stand for half an hour, until a skin forms on the surface. Meanwhile, preheat the oven to 350F/180C/gas mark 4.
13.   Slide the baking mats/sheets into the middle or lower shelf of the preheated oven. Bake for 12 minutes, quickly opening and shutting the oven door twice during the cooking time to let the steam escape.
14.   Take the baking mats/sheets out of the oven. Slide the mats/sheets of parchment paper with shells onto a work surface and leave to cool.

To make the ganache 

1.       Cut the butter into pieces.
2.       Break all the dark and milk chocolate into pieces and put into a bowl. Boil the cream and pour about a third at a time onto the chopped chocolate, mixing each time. The mixture will separate and look grainy, but keep mixing and it will come together.
3.       Allow the chocolate mixture to cool to 122F/50C.
4.       Add the hazelnut spread and chopped butter, beat until smooth.
5.       Pour into a wide dish. Press clingfilm onto the surface of the ganache and refrigerate until thick enough to pipe.

To assemble the macarons

1.       Spoon the ganache into a pastry bag fitted with a 1cm plain tip. Pipe a generous round onto a shell, then top with another shell, twisting lightly so that the filling spreads and bulges enticingly.
2.       Store the macarons covered in the fridge for at least 24 hours to allow the inside of the macaron shells to soften.
3.       Bring back to room temperature before eating.


Infiniment Vanilla Macarons

Ingredients 

For the macaron shells

300g icing sugar
150g ground almonds
150g ground hazelnuts
220g egg whites at room temperature, aged 7 days
3 vanilla bean
4.5g yellow food colouring
75 ml mineral water
300g granulated sugar

For the vanilla ganache

440g white chocolate, preferably valrhona
400g whipping cream
1 vanilla bean from Mexico
1 vanilla bean from Madagascar
1 vanilla bean from Tahiti

Method


To make the shells

1.       Sift the almond flour and powdered sugar in a medium bowl. Split the vanilla beans and scrap the seeds. Add them to the almond flour & powdered sugar mixture. Add the first hlaf of egg whites (110g) to the almond/sugar/vanilla mixture, without mixing them.
2.       In a small saucepan, combine the water and sugar, bring to a boil until it reaches 118′C. Meanwhile, place the second half of egg whites in the bowl of a mixer equipped with the whisk attachment. When the sugar syrup is at 115′C start beating the whites on medium speed until they reach soft peaks.
3.       Pour the sugar at 118′C over the egg whites. Beat until the temperature of the mixture drops to 50′C. Fold the meringue into the almond-sugar-egg white mixture until it’s homogeneous. Place in a large pastry bag with a plain 1cm tip.
4.       Place parchment paper on two baking trays and use a pencil to draw 1 1/2 inches circles to cover the surface with 1/2 inch in between. You should have 36 circles on each parchment papers. Turn over the paper so the pencil marks won’t transfer to the meringues.
5.       Pipe rounds of the meringue dough onto the prepared parchment paper. Let the meringues out at room temperature for at least 30 minutes. This is a very important step as the piped meringue rounds develop a thin ‘crust’ over their surface during the rest.
6.       Preheat the oven to 350′F/180C. Bake the meringues for exactly 12 minutes. Open the oven door quickly-twice during cooking. When the cookies are cooked slide the parchment paper onto a work surface and leave them to cool.

For the vanilla ganache

1.       Split the vanilla beans in half and scrap the seeds with the tip of a knife. Add them to the heavy cream along with beans. Bring to a boil in a small saucepan. Remove from heat. Cover and let infuse 30 minutes.
2.       Place the chopped white chocolate in a bowl of a bain-marie and melt. Remove the vanilla beans from the cream and pour the mixture over the melted chocolate in three addition. Mix until smooth and scrap the mixture in a pyrex dish. Cover with plastic wrap and let it cool in the refrigerator.

Assemble the macarons:

1.       Place the vanilla ganache in a pastry bag equipped with a plain tip. Garnish half the vanilla meringues with the ganache and cover with the other half to make a sandwich. Refrigerate in an hermetic box for 24 hours. Let them come to room temperature before enjoying them.


Pear Tarte Tatin

I saw Gordan Ramsay making this Pear Tarte Tatin on tv, I couldnt wait to make it the next day, it tastes so yummm - caramelised pear with crispy buttery puff pastry tart - I made this a few times, everyone loves it especially when it freshly comes out from the oven hot :-d

Cherie Kelly's Pear Tarte Tatin

You can substitute the pears with apples, this recipe make a whole 7-8 inches tart or 16 small tarts using a muffin tray.

Recipe adapted from Gordan Ramsay


Pear Tarte Tatin


Ingredients

8 pears
100g caster sugar
100g butter
2 star anise
3 cardamom pods
1 large cinnamon stick (or a few teaspoon of cinnamon powder)
2 tbsp brandy
500g block all-butter puff pastry

Method

1. Core the pears, then peel as neatly as possible and halve. If you like, they can be prepared up to a day ahead and kept in the fridge, uncovered, so that they dry out.
2. Tip the sugar, butter, star anise, cardamom and cinnamon into an ovenproof frying pan, about 20cm wide, and place over a high heat until bubbling. Shake the pan and stir the buttery sauce until it separates and the sugar caramelises to a toffee colour.
3. Lay the pears in the pan, then cook in the sauce for 10-12 mins, tossing occasionally, until completely caramelised. Don't worry about them burning - they won't - but you want to caramelise them as much as possible. Splash in the brandy and let it flambé, then set the pears aside.
4. Heat oven to 200C/fan 180C/gas 6. Roll the pastry out to the thickness of a £1 coin. Using a plate slightly larger than the top of the pan, cut out a circle, then press the edges of the circle of pastry to thin them out.
5. When the pears have cooled slightly, arrange them in the pan, cut side up, in a floral shape, with the pears around the edge pointing inwards. Rest the cinnamon stick on the top in the centre, with the cardamom pods scattered around.
6. Drape the pastry over the pears, then tuck the edges down the pan sides and under the fruit, using a spoon or knife to lift the pears and tuck the pastry under. This will ensure the pastry 'hugs' the fruit as it cooks, keeping the tart nice and compact.
7. Pierce the pastry a few times, then bake for 15 mins. If a lot of juice bubbles up the side of the pan, pour away the excess juices from the pan to stop the pastry becoming soggy. Reduce oven to 180C/fan 160C/gas 4 and bake for 15 mins more until the pastry is golden. Leave the tart to stand for 10 mins, then invert it carefully onto a serving dish.